Why Whiten Eyes in Photoshop?
Eye whitening in Photoshop is a common and often essential part of the photo editing process. Whether you’re a professional photographer or an amateur enthusiast, achieving bright, clear eyes can dramatically improve the overall look of your portraits. Whitening eyes can enhance the subject’s expressiveness, draw the viewer’s attention, and create a more polished and professional appearance. Many factors can cause eyes to appear dull or discolored, including lighting conditions, camera settings, and even the subject’s health or fatigue. Photoshop provides the tools necessary to correct these issues and restore the natural brightness and clarity of the eyes.
The Importance of Eye Whitening
The eyes are often considered the windows to the soul, and their appearance significantly impacts how viewers perceive an image. Bright, white eyes convey health, vitality, and attentiveness. They can make a subject appear more youthful and alert, while dull or discolored eyes can have the opposite effect. Whitening eyes in Photoshop ensures that the subject’s eyes are the focal point of the image, drawing the viewer’s attention and creating a more compelling visual experience. This technique is particularly important in portrait photography, where the subject’s eyes are often the primary point of interest.
Understanding Eye Whitening in Post-Processing

Eye whitening is a delicate process that requires a balance between enhancement and realism. The goal is to brighten the whites of the eyes while maintaining their natural appearance. Over-whitening can make the eyes look artificial and unnatural, which can detract from the overall aesthetic of the image. The process involves selecting the eye area, applying specific adjustments to brightness, contrast, and color, and blending these changes seamlessly with the surrounding skin. Understanding the different tools and techniques available in Photoshop allows you to achieve professional-looking results without sacrificing the natural beauty of the subject.
Step 1 Open Your Image in Photoshop
The first step is to open the image you want to edit in Photoshop. Launch the Photoshop application on your computer and navigate to ‘File > Open’. Select the image from your computer’s file directory and click ‘Open’. Once the image is loaded, it will appear in the Photoshop interface, ready for editing. It’s always a good idea to work on a duplicate layer to avoid making permanent changes to the original image. To duplicate the layer, right-click on the ‘Background’ layer in the Layers panel and select ‘Duplicate Layer’. This ensures that you can revert to the original image if necessary.
Accessing the Photoshop Interface
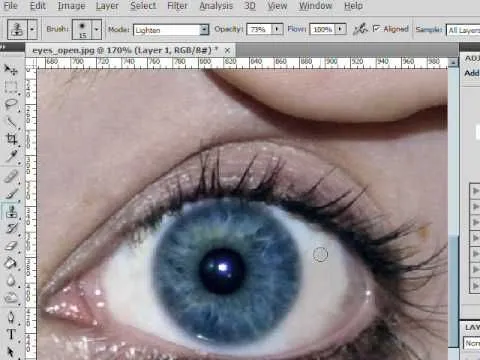
Familiarizing yourself with the Photoshop interface is essential before you begin editing. The interface is organized into several key areas including the menu bar, options bar, tools panel, and layers panel. The menu bar at the top contains various options for file management, editing, and image adjustments. The options bar, located just below the menu bar, displays the settings for the currently selected tool. The tools panel, usually located on the left side of the screen, contains all the essential tools for editing, such as the selection tools, brush tools, and retouching tools. The layers panel, typically found on the right side, allows you to manage the different layers of your image.
Understanding Layers and Duplication

Layers are a fundamental concept in Photoshop. They allow you to edit different parts of your image independently without affecting other areas. When you open an image, it typically starts as a single ‘Background’ layer. Duplicating this layer is crucial before making any changes, as it protects your original image. By duplicating the layer, you create a copy that you can edit without risk. To duplicate a layer, right-click on the layer in the Layers panel and select ‘Duplicate Layer’ or use the shortcut Ctrl+J (Windows) or Cmd+J (Mac). All adjustments for eye whitening should be made on the duplicated layer.
Step 2 Select the Eye Area
Precise selection is key to effective eye whitening. You need to isolate the white part of the eye without affecting the iris, pupil, or surrounding skin. Several selection tools are available in Photoshop, but the Lasso Tool or the Elliptical Marquee Tool are often the most effective for this task. Select the tool from the tools panel (L or M). Carefully trace around the white area of the eye, ensuring that you include only the area you want to whiten. A precise selection will prevent any unwanted changes to the rest of the image.
Using the Lasso Tool for Precise Selection
The Lasso Tool (L) allows you to draw freehand selections. Zoom in on the eye area to ensure accuracy. Click and drag the Lasso Tool around the white part of the eye, carefully following the contours. Close the selection by connecting the end of your line back to the starting point. A successful selection will be indicated by a dotted line, known as marching ants, surrounding the selected area. For more complex shapes, you can combine the Lasso Tool with other selection tools or techniques, such as adding or subtracting from the selection.
Refining the Selection for Natural Results

Refining the selection is crucial for a natural result. Even with careful use of the Lasso Tool, the selection may not be perfect. Use the ‘Select and Mask’ feature (Select > Select and Mask) to fine-tune the edges of the selection. In the ‘Select and Mask’ workspace, you can adjust the feather, contrast, and smoothness of the selection. Feathering softens the edges, making the transition between the selected and unselected areas more seamless. Increasing the contrast sharpens the edges, while increasing the smoothness softens them. These adjustments help to blend the whitened area with the surrounding skin and iris.
Step 3 Apply Whitening Techniques
Once you have a good selection, you can apply the whitening techniques. Several adjustment tools in Photoshop can be used to brighten the whites of the eyes. These tools allow you to modify the brightness, contrast, and color of the selected area. The goal is to achieve a brighter, cleaner look without making the eyes appear artificial. Experimenting with these tools is key to finding the right balance for your image. Generally, start with small adjustments and gradually increase them until you achieve the desired effect. Remember to always work non-destructively by using adjustment layers.
Adjusting Brightness and Contrast
The Brightness/Contrast adjustment (Image > Adjustments > Brightness/Contrast) is a simple and effective way to brighten the eyes. Increase the brightness slightly to make the whites of the eyes appear whiter. You can also adjust the contrast to make the whites appear more distinct from the surrounding areas. Use this adjustment carefully, as excessive changes can lead to a washed-out or unnatural look. Start with small adjustments and monitor the results closely. A slight increase in brightness and contrast can often make a significant difference, enhancing the clarity and visual appeal of the eyes.
Using the Curves Adjustment

The Curves adjustment (Image > Adjustments > Curves) provides more control over the brightness and contrast of your image. This tool allows you to precisely adjust the tonal range. Click on the curve to add control points, and drag the curve up to brighten the whites of the eyes. This tool provides a lot more flexibility compared to the Brightness/Contrast adjustment. By subtly adjusting the curve, you can target specific tones and create a more natural-looking result. The Curves adjustment is often preferred by professionals because it provides greater precision and control.
Using the Hue/Saturation Adjustment
The Hue/Saturation adjustment (Image > Adjustments > Hue/Saturation) is useful for removing any unwanted color casts or redness from the eyes. If the whites of the eyes have a yellow or red tint, you can use this tool to desaturate or modify the hue. Select the ‘Master’ option in the Hue/Saturation panel and reduce the saturation slightly to remove any color tint. This can help to make the eyes appear cleaner and brighter. Be careful not to overdo it, as excessive desaturation can make the eyes look dull. This step is particularly useful for addressing bloodshot eyes or other discoloration issues.
Step 4 Refine and Blend the Changes
After applying the whitening techniques, refine the adjustments to blend them seamlessly with the rest of the image. This step involves adjusting the opacity, feathering the edges, and making subtle adjustments to the colors and tones. This process is vital for achieving a natural, polished look. Carefully examine the image and identify any areas that look unnatural or over-edited. The goal is to make the changes appear subtle and realistic, enhancing the subject’s eyes without drawing undue attention to the editing process.
Adjusting Opacity for a Realistic Look

The opacity setting in the Layers panel allows you to control the intensity of the adjustments. If the eye whitening appears too strong, reduce the opacity of the adjustment layer. This will soften the effect and make it appear more natural. Experiment with different opacity levels until you achieve the desired balance between brightness and realism. This step is particularly useful if you’ve applied multiple adjustment layers, allowing you to fine-tune the overall effect without having to modify each individual setting. Opacity adjustments help to create a more cohesive and believable image.
Softening the Edges of the Selection
Softening the edges of the selection ensures a smooth transition between the whitened area and the surrounding skin. If the edges of the selection are too sharp, the eyes may appear artificial. You can soften the edges using the ‘Feather’ option (Select > Modify > Feather) or by applying a Gaussian blur (Filter > Blur > Gaussian Blur) to the adjustment layer’s mask. A slight feathering will help to blend the edges, while a Gaussian blur can create a more subtle transition. Experiment with different feathering or blurring radii until you achieve a seamless blend. The goal is to eliminate any harsh lines and create a natural-looking result.
Step 5 Advanced Techniques and Tips
Once you’re comfortable with the basic eye whitening techniques, you can explore more advanced methods to enhance the results. These techniques can address specific issues, such as removing redness and adding sparkle to the eyes. Advanced techniques often require a keen eye for detail and a good understanding of the various Photoshop tools. By incorporating these methods into your workflow, you can achieve professional-looking results and create stunning portraits.
Removing Redness and Blood Vessels

Redness and blood vessels in the eyes can detract from their appearance. To remove them, you can use the Spot Healing Brush Tool or the Clone Stamp Tool. Select the Spot Healing Brush Tool (J) from the tools panel and click on the red areas to automatically remove them. The Clone Stamp Tool (S) allows you to sample a clean area of the eye and clone it over the red areas. For this, you need to select the Clone Stamp tool, then hold the Alt key (Option key on Mac) and click on a clean part of the eye to sample it. Then, click and drag over the red areas to cover them. Be careful not to overdo this, as it can create an unnatural look.
Adding Sparkle and Enhancements
Adding sparkle and enhancements can make the eyes appear more vibrant and captivating. One way to do this is to slightly brighten the catchlights (the small highlights) in the eyes. Use the Dodge Tool (O) to lightly brighten the catchlights, making the eyes appear more alive. Another option is to increase the contrast in the iris using the Unsharp Mask filter (Filter > Sharpen > Unsharp Mask). This will enhance the details and make the eyes appear more defined. Always apply these enhancements subtly to avoid an artificial look.
Common Mistakes and How to Avoid Them
Avoiding common mistakes is essential for achieving natural-looking eye whitening results. Over-whitening, unnatural blending, and neglecting the details can all detract from the image. The most common mistake is over-whitening the eyes, which results in an artificial and unrealistic look. Always apply adjustments subtly and monitor the results closely. Another common mistake is using a selection that is too harsh or doesn’t blend well with the surrounding skin. Always refine the selection and use feathering or blurring to create a seamless transition. Lastly, neglecting details such as the catchlights or redness can also make the eyes appear less than perfect. Take the time to address these details for the best results.
By mastering these techniques and avoiding common pitfalls, you can create stunning, professional-looking portraits with beautifully bright and expressive eyes.
